Net Inspector incorporates a user-based authentication and authorization mechanism, by employing users with different levels of access rights (administrator, operator, guest). Access is further controlled by applying user views to users. For more information about users and user views, refer to the Appendix: About Users, Access Rights and User Views topic. For more information about user views, see also Configuring User Views topic.
This topic describes how to create and manage user accounts in Net Inspector.
Note: Only users with administrator access rights are permitted to configure settings described in this topic.
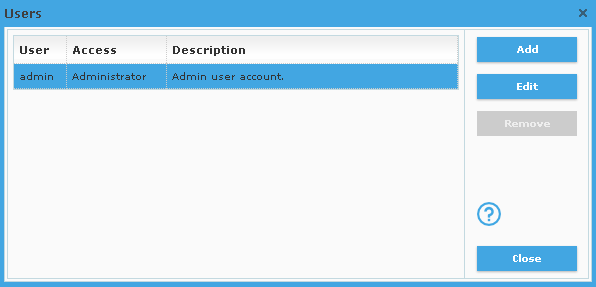
Select the Settings / Users command to open the Users dialog box (as shown in the image below).
Figure: The Users dialog box, listing the default "admin" user account
The Users dialog box is used for managing Net Inspector user accounts, i.e., creating, editing and deleting user accounts and their properties (usernames, passwords, access rights, descriptions).
Note: The admin user account with administrator access rights is built into Net Inspector. By default, both, the username and password of this account is admin. It is recommended to change the password of the admin user account as soon as possible by entering the new password in the Edit User dialog box.
To create a new user account, click the Add button in the Users dialog box. This opens the New User dialog box (as shown in the figure below).
To edit an existing user account, select it in the Users dialog box and click the Edit button. This opens the Edit User dialog box, which has the same appearance as the New User dialog box.
To delete an existing user account, select it in the Users dialog box and click the Remove button. The default admin user account cannot be deleted.
In the Users dialog box, click the Add or Edit button, to open the New/Edit User dialog box (shown below).
Figure: New/Edit User dialog box
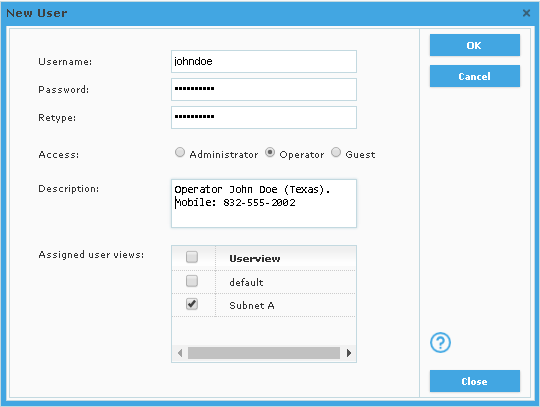
Into the Username input line in the New/Edit User dialog box, specify the user name. Username is case sensitive!
In the Password input line, enter the password for the user account. Password is case sensitive!
In the Retype input line, enter the password again (for confirmation).
In the Access section, select the access rights for the given user (administrator, operator, guest).
In the Description input line, optionally enter a description of the account or its holder.
In the Assigned user views section, select one or more user views by checking the user view checkboxes. This will assign the selected (checked) user view(s) to the given user. User will be allowed to open the selected user view(s).
When you have specified all the settings, click the OK button in the upper-right section of the dialog box to apply the changes and close the New/Edit User dialog box.
Figure: The Users dialog box, listing the default "admin" and a newly configured "johndoe" user account
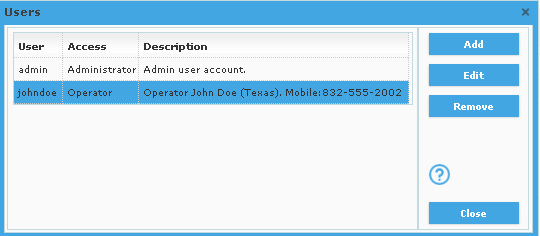
The newly configured user account appears in the Users dialog box. Click the Close button in the lower-right section of the dialog box to close it.
One can now log in to Net Inspector using the new user account.